Filters
Before you start zipping files, you may want to configure a filter or your own to include certain files, exclude certain files, and/or include one or more options.
With the Filters drop down menu on the Create/Share (Edit) tab you can create such filters. You also might want to click one or more of the buttons in the Convert Files As They Are Added section. You can edit the configuration for these in the WinZip Settings.
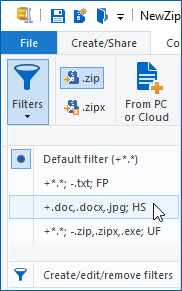
To create a filter, edit a filter, or remove a filter from your list; click Create/edit/remove filters on the Filters drop down menu. The Default filter will be the only thing displayed and you will see it is set to add everything. You can change your default if you wish, but please be careful doing so. You will want to click Create new to start creating filters. On either the Include tab or the Exclude tab of the Create New Filter dialog, you can add or remove a pattern, such as *.jpg (the asterisk is a wildcard indicating all). The Options tab provides three include options and one file attribute option. After you have created a filter, it will be available on the Filters drop down menu for future file zipping. It can also be edited or removed.

The From PC or Cloud button
When you have your options set as you like, you can click the From PC or Cloud button to open the Add dialog. Note: When a Zip file is open in WinZip, this button will be found on the Edit tab.
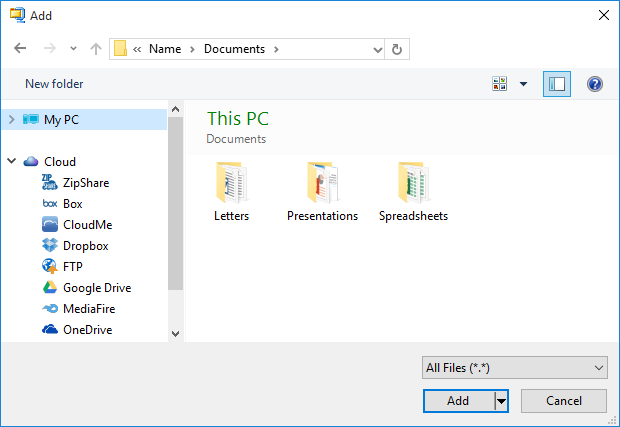
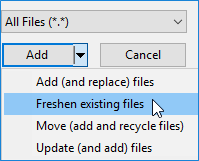
After finding the files and/or folders you want to zip, click the Add button in this dialog. If you set a custom filter, files will be included and/or excluded according to that filter. You can also choose Freshen, Move, or Update from the Add drop down menu.
The WinZip window will now display showing what you have added. At this point, you can add more files or you can click To PC or Cloud in the Save section when you have finished. In the dialog that opens, you will need to browse to the location where you want to save your Zip file, type the name you wish to use, and click Save. You can share your Zip file before or after you save it.
Was this article helpful?
Tell us how we can improve it.