This article provides steps for zipping files using the default view and the interactive and context sensitive interface in WinZip 19 and later. The steps provided are not the only way to create a Zip file with WinZip. Other methods you may have used in the past can still be used.
For a more comprehensive introduction to new features, please see The Intuitive WinZip Interface. If you have configured WinZip to use the Classic view, please see Zipping files: WinZip Classic view.
Before you begin creating a Zip file, if you want to limit which type or types of files that WinZip will include from your selection, you should create a filter and select to use it.
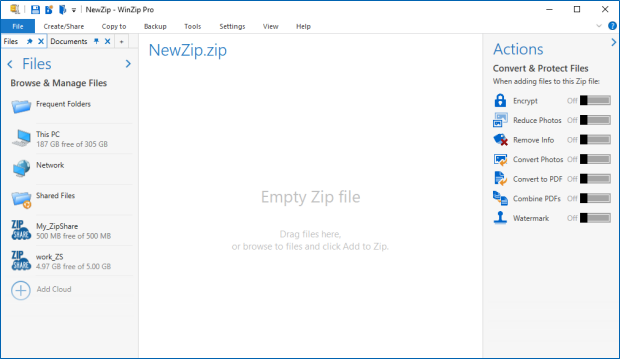
The picture above shows an empty WinZip window in the Default view. Three cloud services are displayed in this picture, because they have already been added previously by clicking Add Cloud in the Files pane. In the Zip file pane in the center, you will see the instruction Drag files here, or browse to files and click add. You can drag and drop files and/or folders from the Files pane, from the desktop, or from an open folder in Windows Explorer.
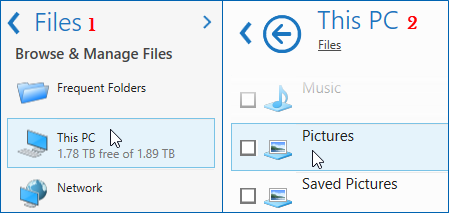
Here is a step by step example showing a Zip file being created by browsing for and adding files. In this example, we will add files from the Pictures folder.
- In the Files pane, click (1) This PC and then double click (2) Pictures (you may need to double click a folder in this as well)
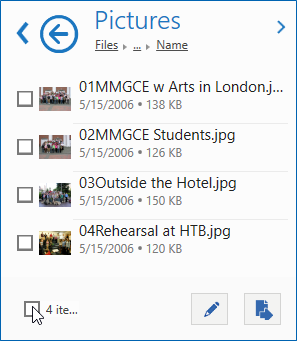
- In Pictures, click to the left of the files you want to select or click the box at the bottom left to select all of the files
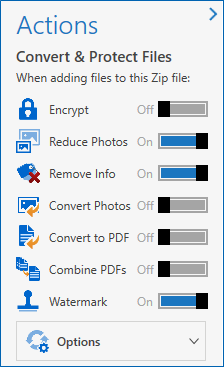
- Turn options on in the Actions pane if wanted; if this is the first use of that option, you may be prompted to configure (Reduce Photos, Remove Info, and Watermark are turned on for this example)
- Now click the Add to Zip icon, the one to the right at the bottom of the Files pane
- Selected conversions will be applied as files are being zipped and now the files will display in the Zip file pane
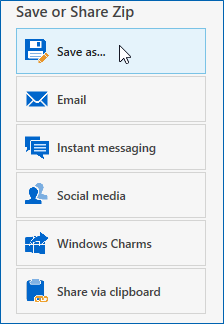
- Other files can be located and added if wanted at this time; when you are ready, click one of the features under Save or Share Zip in the Actions pane (in this example we click Save as)
- Type the name you want for your Zip file; if you are saving, choose a target location for the file and click the Save button
If you have any questions about this information, please submit a Technical Support ticket.
Related Articles:
The Intuitive WinZip Interface
Zipping files: WinZip Classic view (ribbon)
Quick examples of how to zip files with WinZip
How do I compress the contents of a folder and later restore it?
How to Zip files with their folder information
How do I control the folder information WinZip stores in a Zip file?
Split Zip files and how to create them
Was this article helpful?
Tell us how we can improve it.